vue安装命令
使用cmd输入以下命令
npm install -g @vue/cli# 验证是否安装成功vue --version创建一个项目
xxxxxxxxxx#项目名称my-project不能出现大写但是可以用“-”进行连接vue create my-project创建项目
xxxxxxxxxxvue create vue-demo项目名称不要出现大写
npm运行项目
cd到项目里,然后使用
xxxxxxxxxxnpm run serve文本插值
v-html
v-html是原始html
x<template> <h3>模板语法</h3> <p>直接赋值:</p> <p>数字运算:</p> <p>三目运算符:</p> <p>调用函数:</p> <!-- 注意花括号内不支持换行表达式,只支持单行表达式 --> <!-- <p></p> --> <!-- 以上if就是本身需要换行的,即使不写else也是不支持的 --> <p></p> <p v-html = "rawHtml"></p></template>
<script>export default{ data(){ return{ msg : "神奇的语法", hello : "hello world", number : 10, ok : true, message: "大家好", rawHtml: "<a href = 'https://www.xiaoyangtongzhi.cn'>软件编程学习Y</a>" } }}</script>属性绑定
v-bind
xxxxxxxxxx<template>  <!-- 由于v-bind非常常用所以v-bind可以省略直接在前面加: -->  <div v-bind:id="dynamicId" :class="dynamicClass" :title="dynamicTitle">测试</div>  <button :disabled="isButtonDisabled">Button</button>  <!-- 动态绑定多个值 -->  <div v-bind="objectOfAttrs">测试</div></template>
<script>export default{  data(){    return{      dynamicClass:"appClass",      dynamicId:"appid",      dynamicTitle: undefined,//属性值为null/undefined值会被移除      isButtonDisabled: true,      objectOfAttrs: {//动态绑定多个值:一次性绑定多个属性        class: "appClass",        id: "appID",      }    }  }}</script>
<style>
.appClass{  color:red;  font-size:30px;}
</style>
条件渲染
v-if
xxxxxxxxxx<template>    <h3>条件渲染</h3>    <!-- 如果flag为真则"你能看见我吗"显示,如果为假则下面"那你还是看看我吧"显示 -->    <!-- 相当于if else语句 -->    <div v-if="flag">你能看见我吗</div>    <div v-else>那你还是看看我吧</div></template>
<script>export default{    data(){        return{            flag:false,        }    }}</script>
v-else-if
xxxxxxxxxx<template>    <h3>条件渲染</h3>        <!-- 下面相当于if else-if else语句 -->    <div v-if="type ==='A'">A</div>    <div v-else-if="type ==='B'">B</div>    <div v-else-if="type ==='C'">C</div>    <div v-else>Not A/B/C</div></template>
<script>export default{    data(){        return{            type:"D" //显示Not A/B/C        }    }}</script>
v-show
xxxxxxxxxx<template>    <h3>条件渲染</h3>    <!-- flag为真则能看见,为假则看不见 -->    <!-- v-show是基于CSS的display: none;实现的 -->    <div v-show="flag">你能看见我吗</div></template>
<script>export default{    data(){        return{            flag:false,        }    }}</script>
列表渲染
v-for
作用和python的for i in list1一样
以下for xxx in xxx中的in可以替换成of效果一样
xxxxxxxxxx<template> <h3>列表渲染</h3> <!-- index是索引的下标 --> <p v-for="(item,index) in names">-</p></template>
<script>export default{ data(){ return{ names:["小杨", "小李", "小琪"] } }}</script>执行结果:
在网页源代码中生成三个便利的p标签

v-for解析json数据
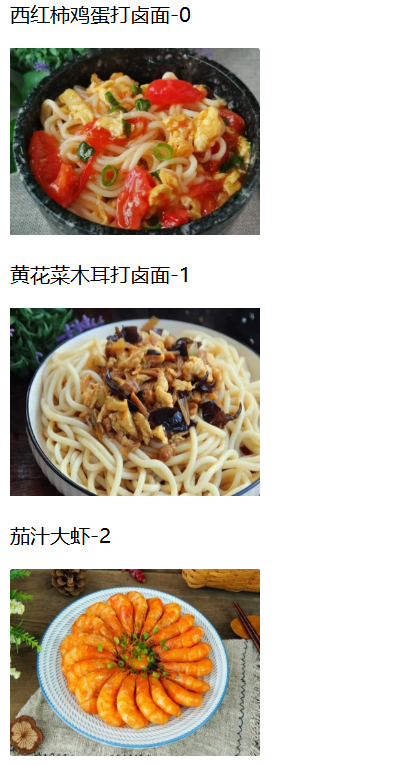
xxxxxxxxxx<template> <h3>列表渲染</h3> <!-- index是索引的下标 --> <div v-for="(item,index) in result"> <p>-</p> <img v-bind="objectOfAttrs" :src="item.imgLink" :alt="item.id"></img> </div></template>
<script>export default{ data(){ return{ objectOfAttrs:{ class: "imgClass", id: "imgID" }, result:[//模拟json格式数据 { "id":1001, "title":"西红柿鸡蛋打卤面", "imgLink": "https://xiaoyangtongzhi.cn/link/food/img_food/xihongshijidandalumian.png" }, { "id":1002, "title":"黄花菜木耳打卤面", "imgLink": "https://xiaoyangtongzhi.cn/link/food/img_food/huanghuacaimuerdalumian.png" }, { "id":1003, "title":"茄汁大虾", "imgLink": "https://xiaoyangtongzhi.cn/link/food/img_food/qiezhidaxia.png" } ] } }}</script>
<style>.imgClass{ width:200px; height: 150px;}</style>运行结果:
v-for便利对象的所有属性
遍历对象有三个值,value key index 顺序不能改
xxxxxxxxxx<template> <h3>列表渲染</h3> <div> <!-- 使用v-for遍历对象,value是值,key是键名,index是下标 --> <p v-for="(value,key,index) in userInfo">--</p> </div></template>
<script>export default{ data(){ return{ userInfo:{//对象 name:"小杨", age:20, sex:"男" } } }}</script>运行结果:

通过key管理状态
key
xxxxxxxxxx<template> <h3>key属性添加到v-for中</h3> <p v-for="(item,index) in names" :key="index"></p></template>
<script>export default { data(){ return { names:["小杨","小李","小张"], } }}</script>注:一般不会把index付给key,key应该是不会变动的,如果往names列表中间加了新数据,那么所有的index就变动了
因此key一般赋值给id类不会变且唯一的值,如下例子:
xxxxxxxxxx<template> <h3>key属性添加到v-for中</h3> <div v-for="item in result" :key="item.id"> <p></p> <img v-bind="objectOfAttrs" :src="item.imgLink" :alt="item.id" /> </div></template>
<script>export default { data(){ return { objectOfAttrs:{ class: "imgClass", id: "imgID" }, result:[//模拟json格式数据 { "id":1001, "title":"西红柿鸡蛋打卤面", "imgLink": "https://xiaoyangtongzhi.cn/link/food/img_food/xihongshijidandalumian.png" }, { "id":1002, "title":"黄花菜木耳打卤面", "imgLink": "https://xiaoyangtongzhi.cn/link/food/img_food/huanghuacaimuerdalumian.png" }, { "id":1003, "title":"茄汁大虾", "imgLink": "https://xiaoyangtongzhi.cn/link/food/img_food/qiezhidaxia.png" } ] } }}</script>
<style>.imgClass{ width:200px; height: 150px;}</style>事件处理(v-on缩写@)
内联事件处理器
事件触发时执行的内联JavaScript语句(与onclick类似)
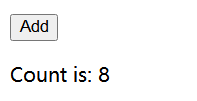
xxxxxxxxxx<template> <h3>内联事件处理器</h3> <!-- v-on可以用@代替写成@click="count++" --> <button v-on:click="count++">Add</button> <p>Count is: </p></template>
<script>export default{ data(){ return{ count:0 } }}</script>执行结果:
点击按钮不断累加
方法事件处理器
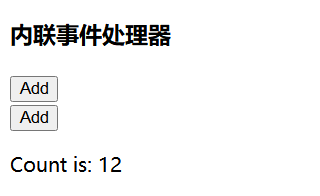
xxxxxxxxxx<template> <h3>内联事件处理器</h3> <!-- click是单击 --> <button @click="addCount">Add</button> <br/> <!-- dblclick是双击英文(double click缩写) --> <button @dblclick="addCount">Add</button> <p>Count is: </p></template>
<script>export default{ data(){ return{ count:0 } }, //以后所有的方法都放在这里 methods: { addCount(){ console.log("点击了按钮"); //所有写在data里的值都可以用this.来访问 this.count++; } }}</script>运行结果:
事件参数
获取event对象
xxxxxxxxxx<template> <h3>内联事件处理器</h3> <button @click="addCount">Add</button> <p>Count is: </p></template>
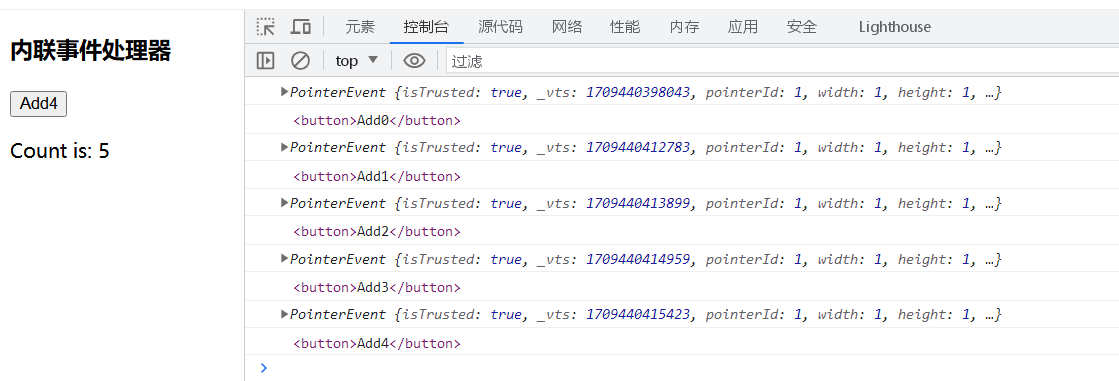
<script>export default{ data(){ return{ count:0 } }, methods: { addCount(e){ console.log(e); console.log(e.target); //vue中的event对象就是原生js的event对象 e.target.innerHTML = "Add" + this.count; this.count++; } }}</script>运行结果:
传递参数
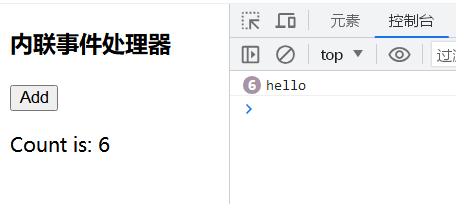
xxxxxxxxxx<template> <h3>内联事件处理器</h3> <button @click="addCount('hello')">Add</button> <p>Count is: </p></template>
<script>export default{ data(){ return{ count:0 } }, methods: { addCount(msg){ console.log(msg); this.count++; } }}</script>运行结果:将hello传递过去并在控制台输出
事件传参
xxxxxxxxxx<template> <h3>事件传参</h3> <p @click="getNameHandler(name,$event)" v-for="(name,index) in names" :key="index"></p></template>
<script>export default{ data(){ return{ names:["小杨","小李","小琪"] } }, methods:{ getNameHandler(name,event){ console.log(name); console.log(event); } }}</script>效果:当点击网页上生成的p标签时,点击哪个就会把哪个的名字和event对象在控制台输出
运行结果:

事件修饰符(v-on)
在处理事件时调用 event.preventDefault() 或 event.stopPropagation() 是很常见的。尽管我们可以直接在方法内调用,但如果方法能更专注于数据逻辑而不用去处理 DOM 事件的细节会更好。
为解决这一问题,Vue 为 v-on 提供了事件修饰符。修饰符是用 . 表示的指令后缀,包含以下这些:
- .stop
- .prevent
- .self
- .capture
- .once
- .passive
阻止默认事件
xxxxxxxxxx<template>    <h3>事件修饰符-阻止默认事件</h3>    <!-- @click.prevent="clickHandle"和方法里的event.preventDefault();效果等价,阻止a标签点击跳转 -->    <a @click.prevent="clickHandle" href="https://www.xiaoyangtongzhi.cn">软件编程学习Y</a>"</template>
<script>export default{    data(){        return{                    }    },    methods:{        clickHandle(event){            //通过event对象阻止默认事件            // event.preventDefault();            console.log("点击了事件");        }    }}</script>
运行结果:点击软件编程学习Y超链接不跳转

阻止事件冒泡
什么是事件冒泡:如下例子,p在div里,p和div都有个点击函数,如果我点击p,那么会同时触发div的点击函数和p的点击函数!
xxxxxxxxxx<template>    <a @click.prevent="clickHandle" href="https://www.xiaoyangtongzhi.cn">软件编程学习Y</a>"    <h3>事件修饰符-阻止事件冒泡</h3>    <div @click="clickDiv">        <p @click="clickP">测试冒泡</p>    </div></template>
<script>export default{    data(){        return{                    }    },    methods:{        clickDiv(){            console.log("点击了div");        },        clickP(){            console.log("点击了p");        }    }}</script>
运行结果:

阻止事件冒泡1
xxxxxxxxxx<h3>事件修饰符-阻止事件冒泡</h3> <div @click="clickDiv"> <!-- @click.stop="clickP"和方法里的e.stopPropagation();效果等价,阻止事件冒泡 --> <p @click.stop="clickP">测试冒泡</p></div>或者
阻止事件冒泡2
xxxxxxxxxxclickP(e){ e.stopPropagation(); console.log("点击了p");}用事件参数e调用stopPropagation()函数即可
运行结果:

数组变化侦测
操作数组且不生成新数组的7种方式
vue能够侦听响应式数组的变更方法,并在它们被调用时触发相关的更新。这些方法包括:
使用以下方法可以使原数组发生变化
- push() 从后面添加数据
- pop() 从后面删除数据
- shift() 从前面删除数据
- unshift() 从前面添加数据
- splice() 替换删除数据
- sort() 排序数据
- reverse() 反转数据
练习例子:
xxxxxxxxxx<template><h3>数组变化侦测</h3><button @click="pushListHandle">从后面添加数据</button><button @click="popListHandle">从后面删除数据</button><button @click="shiftListHandle">从前面删除数据</button><button @click="unshiftListHandle">从前面添加数据</button><button @click="spliceListHandle">替换删除数据</button><button @click="sortListHandle">排序数据</button><button @click="reverseListHandle">反转数据</button><ul> <li v-for="(name,index) in names" :key="index"></li></ul></template>
<script>export default{ data(){ return{ names:['张三','李四','王五','赵六'] } }, methods:{ pushListHandle(){ this.names.push('小琪'); }, popListHandle(){ this.names.pop(); }, shiftListHandle(){ this.names.shift(); }, unshiftListHandle(){ this.names.unshift('小琪'); }, spliceListHandle(){ //把第一个位置替换为小琪,删除原列表从插入位置开始包含插入位置的两个数据 this.names.splice(1,2,'小琪'); }, sortListHandle(){ this.names.sort(); }, reverseListHandle(){ this.names.reverse(); } }}</script>操作数组但生成新数组的3种方式
变更方法,顾名思义,就是会对调用它们的原数组进行变更,相对地,也有一些不可变(immutable)方法,例如filter(),concat()和slice(),这些都不会更改原数组,而总是返回一个新数组,当遇到的是非变更方法时,我们需要将旧的数组替换为新的
使用以下三个方法不会使原数组发生变化,但会生成新数组保存结果
- filter() 过滤数据
- concat() 拼接一个数组
- slice() 截取数组
xxxxxxxxxx<template><h3>数组变化侦测</h3><button @click="filterListHandle('赵六')">过滤数据</button><button @click="concatListHandle(['赵六','小琪'])">拼接列表</button><button @click="sliceListHandle(1, 3)">截取数组</button><ul> <li v-for="(name,index) in names" :key="index"></li></ul>
</template>
<script>export default{ data(){ return{ names:['张三','李四','王五'] } }, methods:{ //不会引起UI自动更新,因为以下三个函数是生成新的数组 //要想让UI也跟着变化就重新赋值 filterListHandle(name){ this.names = this.names.filter(item=>item==name); }, concatListHandle(list){ this.names = this.names.concat(list); }, sliceListHandle(start,end){ this.names = this.names.slice(start, end); }
}}</script>计算属性(computed)
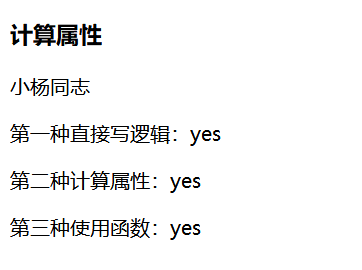
xxxxxxxxxx<template><h3>计算属性</h3><p></p><!-- 模板语法中的复杂逻辑建议使用第二种方法处理,使用computed计算属性 --><!-- 第一种方法不易处理复杂情况 --><!-- 第二种方法在数据没有变动的情况下,不管调用几次,都只会执行一次 --><!-- 第三种函数方法,每执行一次,就会调用一次,非常浪费内存,所以不建议使用 --><p>第一种直接写逻辑:</p><p>第二种计算属性:</p><p>第三种使用函数:</p></template>
<script>
export default { data() { return { itxiaoyang:{ name:"小杨同志", content:["前端","Java","python"] } } }, //计算属性 computed:{ itxiaoyangContent(){ return this.itxiaoyang.content.length > 0 ? "yes":"no"; } }, methods:{ itxiaoyangContents(){ return this.itxiaoyang.content.length > 0 ? "yes":"no"; } } }</script>区别:
- 模板语法中的复杂逻辑建议使用第二种方法处理,使用computed计算属性
- 第一种方法不易处理复杂情况
- 第二种方法在数据没有变动的情况下,不管调用几次,都只会执行一次
- 第三种函数方法,每执行一次,就会调用一次,非常浪费内存,所以不建议使用
运行结果:
computed计算属性不能够传递参数,但是可以使用闭包方式实现,下面是一个例子:
xxxxxxxxxx<template> <p></p></template>
<script> export default{ data(){ return{ names:["张三","李四","王五","赵六","黄七"], } }, computed:{ //isContainName()这里不能接收参数,但是可以直接返回一个函数,并让这个函数接收参数,该方法称为闭包 isContainName(){ return function(name){ for(var i of this.names){ if(i == name){ return true; } } return false; } } } }
</script>
Class绑定
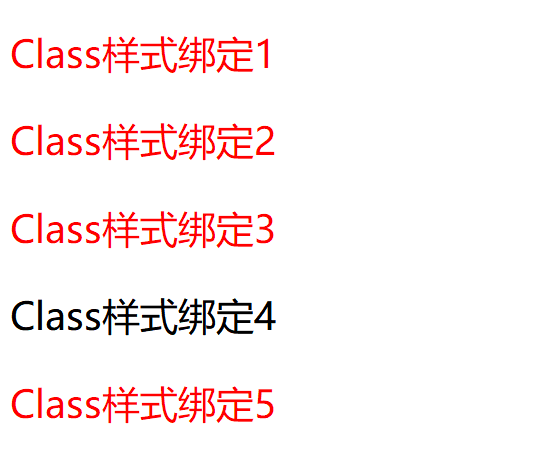
xxxxxxxxxx<template>    <!-- 对象作为class绑定 -->    <p :class="classObject">Class样式绑定1</p>    <!-- 直接绑定多个class -->    <p :class="{'active':isActive, 'text-danger':textDanger}">Class样式绑定2</p>    <!-- 数组作为class绑定 -->    <p :class="[arrActive, arrHasError]">Class样式绑定3</p>    <!-- 数组三元运算符作为class绑定 -->    <p :class="[isActive? 'active':'text-danger']">Class样式绑定4</p>    <!-- 数组和对象一起作为class绑定,注意:只能是数组嵌套对象 -->    <p :class="[{'active':isActive}, arrHasError]">Class样式绑定5</p></template>
<script>    export default {        data() {            return {                isActive: true,                textDanger: true,                classObject:{                    'active':true,                    'text-danger':true                },                arrActive: "active",                arrHasError:"text-danger"            }        }    }
</script>
<style>.active {    font-size: 30px;}.text-danger {    color: red;}</style>
运行结果:
Style绑定
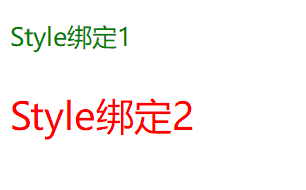
xxxxxxxxxx<template>    <!-- 直接写法 -->    <p :style="{color:activeColor,fontSize:fontSize}">Style绑定1</p>    <!-- 绑定对象格式-常用写法 -->    <p :style="styleObject">Style绑定2</p></template>
<script>    export default {        data() {            return {                activeColor:'green',                fontSize:'20px',                styleObject:{                    color:'red',                    fontSize:'30px'                }            }        }    }
</script>
运行结果:
侦听器(watch)
xxxxxxxxxx<template> <h3>侦听器</h3> <p></p> <button @click="updateHandle">修改数据</button></template>
<script>export default{ data(){ return{ message:"hello" } }, methods:{ updateHandle(){ this.message="world" } }, watch:{ message(newValue,oldValue){ // 数据发生变化自动执行的函数 // 函数名必须与侦听的数据对象保持一致 console.log("新值:" + newValue, "旧值:" + oldValue); } }}</script>运行结果:

表单输入绑定(v-model)
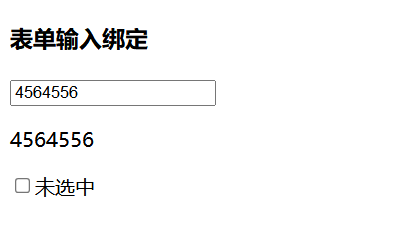
xxxxxxxxxx<template><h3>表单输入绑定</h3><form> <!-- v-model有三个修饰符.lazy关闭输入一次搜索一次 .number只接受数字 .trim去除空格 --> <input type="text" v-model.lazy="message" placeholder="请输入信息"> <p></p> <input type="checkbox" id="checkbox" v-model="checked"> <label for="checkbox"></label></form></template>
<script>export default{ data(){ return{ message:"", checked:false } }}</script>运行结果:
模板引用(操作DOM this.$refs)
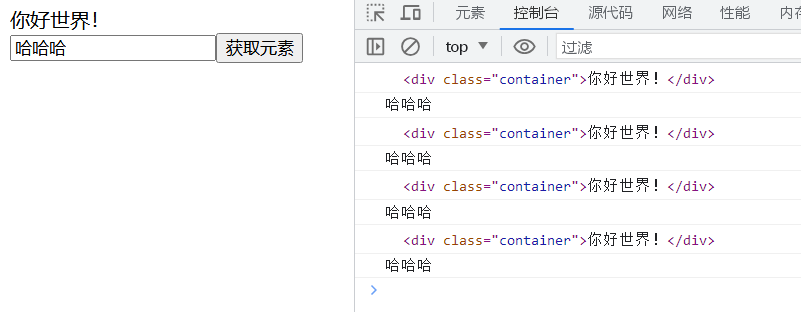
xxxxxxxxxx<template> <div ref="container" class="container"></div> <input type="text" ref="username"/> <button @click="getElementHandle">获取元素</button></template>
<script>/** * 内容改变:{{ 模板语法 }} * 属性改变:v-bind:属性名="属性值" 或者省略只写 :属性名="属性值" * 事件绑定:v-on:事件名="方法名" 或者省略只写 @事件名="方法名" * * 操作DOM:this.$refs.元素ref名.元素属性名 = "属性值"; * 注意:ref很消耗性能,没有必要不要操作DOM */export default{ data(){ return{ content:"hello world!" } }, methods:{ getElementHandle(){ console.log(this.$refs.container); this.$refs.container.innerHTML = "你好世界!"; console.log(this.$refs.username.value); } }}</script>运行结果:
组件组成
组件最大的优势就是可复用性
当使用构建步骤时,我们一般会将Vue组件定义在一个单独的.vue文件中,这被叫做单文件组成(简称SFC)
App.vue
xxxxxxxxxx<template>    <!-- 第三步 显示组件 -->    <MyComponent/></template>
<script>// 第一步 引入组件import MyComponent from './components/MyComponent.vue'
export default{    //第二步 注入组件    components: {        MyComponent    }}</script>
<style></style>
MyComponent.vue
xxxxxxxxxx<template> <div class="container"></div></template>
<script>export default { data() { return { message: '组件基础组成' } }}</script>
<!-- scoped 让当前样式只在当前组件中生效--><style scoped>.container { font-size: 30px; color: red;}</style>
组件的注册方式
全局注册
在main.js中进行注册
main.js 以下为注册一个Header.vue示例
xxxxxxxxxximport { createApp } from 'vue'import App from './App.vue'
import Header from './pages/Header.vue'
const app = createApp(App)//在这之间写全局组件的注册app.component('Header', Header)app.mount('#app')
在App.vue中就不用在script里写import导入了,但是需要在template中写引用
局部注册
以下为局部注册示例,开发中推荐使用局部注册的方式
xxxxxxxxxx<template>  <Header />  <Main />  <Aside /></template>
<script setup>import Header from './pages/Header.vue'import Main from './pages/Main.vue'import Aside from './pages/Aside.vue'</script>
组件传递多类型数据props(父传子)
Parent.vue
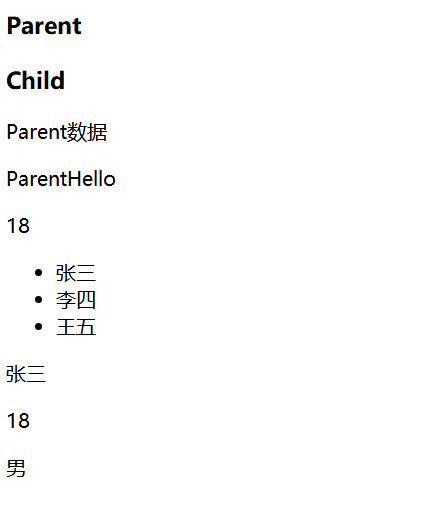
xxxxxxxxxx<template>    <h3>Parent</h3>    <Child title="Parent数据" :demo="message" :age="age", :names="names" :userInfo="userInfo" /></template>
<script>import Child from './Child.vue'export default {    data() {        return {            message:'ParentHello',            age:18,            names:['张三','李四','王五'],            userInfo:{                name:'张三',                age:18,                sex:'男'            }        }    },    components: {        Child    }}</script>
Child.vue
xxxxxxxxxx<template> <h3>Child</h3> <p></p> <p></p> <p></p> <ul> <li v-for="(item,index) in names" :key="index"></li> </ul> <p v-for="(item,index) in userInfo" :key="index"></p></template>
<script>export default{ data(){ return{ } }, props:["title","demo","age","names","userInfo"]}</script>运行结果:
注意:props传递数据只能从父级传递给子级
组件传递Props效验
ComponentA.vue
xxxxxxxxxx<template>    <h3>ComponentA</h3>    <ComponentB :title="title" :names="names" /></template>
<script>import ComponentB from './ComponentB.vue'export default{    data(){        return{            title:"hello world!",            names:['张三','李四','王五']        }    },    components:{        ComponentB    }}</script>
ComponentB.vue
xxxxxxxxxx<template> <h3>ComponentB</h3> <p></p> <p v-for="(name,index) in names" :key="index"></p></template>
<script>export default{ data(){ return{ } }, props:{ //props里是从父元素里传过来的数据是不允许被修改的 title:{ // 常用类型如下,可以接收多种类型,也可以接收一种 type:[String, Number, Array, Object, Boolean], default:'默认值', required:true//必须要传入 }, //数字和字符串可以直接default,但是如果是数组和对象,必须通过工厂函数返回默认值 names:{ type:Array, default(){ return ['默认值1','默认值2','默认值3'] } } }}</script>运行结果:

组件事件this.$emit(子传父数据)
ComponentEvent.vue
xxxxxxxxxx<template> <h3>组件事件</h3> <Child @someEvent="getHandle" /> <p>父元素:</p></template>
<script>import Child from './Child.vue'export default{ data(){ return{ message:"" } }, components:{ Child }, methods:{ getHandle(data){ console.log("触发了",data); this.message = data; } }}</script>Child.vue
xxxxxxxxxx<template>    <h3>Child</h3>    <!-- 调用clickEventHandle函数 -->    <button @click="clickEventHandle">传递数据</button></template>
<script>export default{    data(){        return{            msg:"child数据"        }    },    methods:{        clickEventHandle(){            //传递数据,第一个参数名字,第二个是传递的数据            this.$emit('someEvent',this.msg)        }    }}</script>
运行结果:

组件事件配合v-model使用
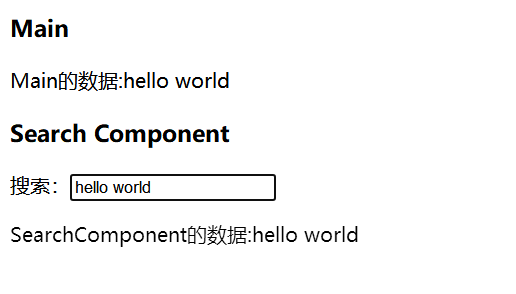
效果:使用watch侦听器可以使得父界面和子界面输入同步
SearchComponent.vue
xxxxxxxxxx<template> <h3>Search Component</h3> <label>搜索:</label><input type="text" v-model="search"> <p>SearchComponent的数据:</p></template>
<script>export default{ data(){ return{ search:'' } }, //侦听器 watch:{ search(newVal, oldVal){ console.log("新值:"+newVal,"旧值:"+oldVal); this.$emit('sendInfo',this.search); } }}</script>Main.vue
xxxxxxxxxx<template> <h3>Main</h3> <p>Main的数据:</p> <SearchComponent @sendInfo="receiveInfo" /></template>
<script>import SearchComponent from './SearchComponent.vue'export default{ data(){ return{ data:"" } }, components:{ SearchComponent }, methods:{ receiveInfo(data){ console.log(data) this.data=data } }}</script>运行结果:
组件数据传递props(子传父)
本质是父给子传递一个函数,函数里有参数,子给参数赋值返回给父
ComponentA.vue
xxxxxxxxxx<template> <h3>ComponentA</h3> <p>父元素:</p> <ComponentB title="标题" :onEvent="dataFn"/></template>
<script>import ComponentB from './ComponentB.vue'export default { data() { return { message:"" } }, components:{ ComponentB }, methods:{ dataFn(data){ console.log(data); this.message = data; } }}</script>ComponentB.vue
xxxxxxxxxx<template> <h3>ComponentB</h3> <p></p></template>
<script>export default { data() { return { } }, props:{ title:String, onEvent:Function }}</script>运行结果:
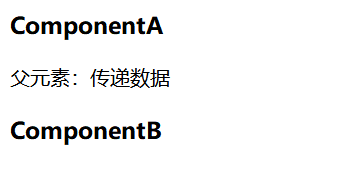
插槽Slots
Slot传递div
App.vue
xxxxxxxxxx<template>    <SlotsBase>        <!-- 将整个div传递给SlotsBase子组件 -->        <div>            <h3>插槽标题</h3>            <p>插槽内容</p>        </div>    </SlotsBase>
</template>
<script>import SlotsBase from './components/SlotsBase.vue'export default{    components:{        SlotsBase    }}</script>
<style></style>
SlotsBase.vue
xxxxxxxxxx<template>    <h3>插槽基础知识</h3>    <slot>        <!-- 插槽传递过来的div将会在这里显示 -->    </slot></template>
<script></script>
运行结果:

Slot默认值
xxxxxxxxxx<template> <h3>SlotsTwo</h3> <slot>插槽默认值</slot></template>如果没有东西传过来那么slot里就会显示默认值
多个Slot命名
使用v-slot进行命名 v-slot:可以写成#号
传递slot
xxxxxxxxxx<SlotsTwo> <!-- v-slot:可以写成#号--> <template v-slot:header> <h3></h3> </template> <template #main> <p>内容</p> </template></SlotsTwo>接收slot
使用name = ""对多个slot指定接收的名称
xxxxxxxxxx<template> <h3>SlotsTwo</h3> <slot name = "header">插槽默认值</slot> <hr> <slot name="main"></slot></template>多个插槽传递和返回数据
App.vue
xxxxxxxxxx<template> <SlotsAttr> <template #header="slotProps"> <h3>-</h3> </template> <template #main="slotProps"> <h3></h3> </template> </SlotsAttr>
</template>
<script>import SlotsAttr from './components/SlotsAttr.vue'export default{ data(){ return{ currentTest:"测试内容" } }, components:{ SlotsAttr }}</script>SlotsAttr.vue
xxxxxxxxxx<template>    <h3>SlotsAttr</h3>    <hr>    <slot name="header" :header="childMessage"></slot>    <slot name="main" :job="jobMessage"></slot></template>
<script>export default {    data(){        return{            childMessage:"子组件数据",            jobMessage:"xiaoyangtongzhi"        }    }}</script>
运行结果:

组件生命周期
xxxxxxxxxx<template> <h3>组件的生命周期</h3> <p></p> <button @click="updateHandle">更新</button></template>
<script> /** 八个生命周期 * 1.创建期:beforeCreate created * 2.挂载期:beforeMount mounted * 3.更新期:beforeUpdate updated * 4.销毁期:beforeUnmount unmounted */export default{ data(){ return{ msg:'更新之前' } }, methods:{ updateHandle(){ this.msg = '更新之后'; } }, beforeCreate(){ console.log('组件创建之前'); }, created(){ console.log('组件创建之后'); }, beforeMount(){ console.log('组件挂载之前'); }, mounted(){ console.log('组件挂载之后'); }, beforeUpdate(){ console.log('组件更新之前'); }, updated(){ console.log('组件更新之后'); }, beforeUnmount(){ console.log('组件销毁之前'); }, unmounted(){ console.log('组件销毁之后'); }}
</script>组件生命周期的应用
xxxxxxxxxx<template> <h3>组件生命周期的函数应用</h3> <p ref="name">小杨同志</p> <ul> <li v-for="(item,index) in banner" :key="index"> <h3></h3> <p></p> </li> </ul></template>
<script>export default{ data(){ return{ banner:[] } }, beforeMount(){ console.log(this.$refs.name);//undefined }, //组件挂在之后 mounted(){ console.log(this.$refs.name);//可以读取到name这个组件 //模拟网络请求 this.banner=[ { title:"标题1", content:"内容1" }, { title:"标题2", content:"内容2" }, { title:"标题3", content:"内容3" } ] },
}</script>组件的切换(:is)
ComponentA.vue
xxxxxxxxxx<template> <h3>ComponentA</h3></template>ComponentB.vue
xxxxxxxxxx<template> <h3>ComponentB</h3></template>App.vue
xxxxxxxxxx<template>    <!-- <UserComponent /> -->    <component :is="tabComponent"></component>    <button @click="changeHandle">切换组件</button></template>
<script>import ComponentA from './components/ComponentA.vue'import ComponentB from './components/ComponentB.vue'export default{    data(){        return{            tabComponent:"ComponentA"        }    },    components:{        ComponentA,        ComponentB    },    methods:{        changeHandle(){            if(this.tabComponent == "ComponentA"){                this.tabComponent = "ComponentB"            }else{                this.tabComponent = "ComponentA"            }        }    }}</script>
通过点击切换组件按钮进行切换
组件保持存活(keep-alive)
ComponentA.vue
xxxxxxxxxx<template> <h3>ComponentA</h3> <p></p> <button @click="updateHandle">更新数据</button></template>
<script>export default{ data(){ return{ msg:"老数据" } }, beforeUnmount(){ console.log("组件被卸载") }, unmount(){ console.log("组件被卸载") }, methods:{ updateHandle(){ this.msg = "新数据" } }}</script>ComponentB.vue
xxxxxxxxxx<template> <h3>ComponentB</h3></template>App.vue
xxxxxxxxxx<template>    <!-- keep-alive用于保持组件存活,当组件被切换时,不会销毁,而是缓存起来,当组件重新被显示时,会重新显示,不会重新创建 -->    <keep-alive>        <component :is="tabComponent"></component>    </keep-alive>    <button @click="changeHandle">切换组件</button></template>
<script>import ComponentA from './components/ComponentA.vue'import ComponentB from './components/ComponentB.vue'export default{    data(){        return{            tabComponent:"ComponentA"        }    },    components:{        ComponentA,        ComponentB    },    methods:{        changeHandle(){            if(this.tabComponent == "ComponentA"){                this.tabComponent = "ComponentB"            }else{                this.tabComponent = "ComponentA"            }        }    }}
</script>
运行效果:
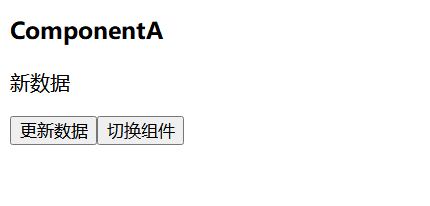
当点击更新数据的时候,A的老数据会变成新数据,点击切换组件,正常组件会被销毁,但是加了<keep-alive>进行包裹后,点击切换回去同样还是新数据
<keep-alive>用于保持组件存活,当组件被切换时,不会销毁,而是缓存起来,当组件重新被显示时,会重新显示,不会重新创建。
异步组件(defineAsyncComponent)
ComponentA.vue
xxxxxxxxxx<template> <h3>ComponentA</h3> <p></p> <button @click="updateHandle">更新数据</button></template>
<script>export default{ data(){ return{ msg:"老数据" } }, beforeUnmount(){ console.log("组件被卸载") }, unmount(){ console.log("组件被卸载") }, methods:{ updateHandle(){ this.msg = "新数据" } }}</script>ComponentB.vue
xxxxxxxxxx<template> <h3>ComponentB</h3></template>App.vue
xxxxxxxxxx<template>    <!-- keep-alive用于保持组件存活,当组件被切换时,不会销毁,而是缓存起来,当组件重新被显示时,会重新显示,不会重新创建 -->    <keep-alive>        <component :is="tabComponent"></component>    </keep-alive>    <button @click="changeHandle">切换组件</button></template>
<script>import ComponentA from './components/ComponentA.vue'// import ComponentB from './components/ComponentB.vue'import {defineAsyncComponent} from 'vue'//异步加载组件const ComponentB = defineAsyncComponent(() =>    import('./components/ComponentB.vue'))export default{    data(){        return{            tabComponent:"ComponentA"        }    },    components:{        ComponentA,        ComponentB    },    methods:{        changeHandle(){            if(this.tabComponent == "ComponentA"){                this.tabComponent = "ComponentB"            }else{                this.tabComponent = "ComponentA"            }        }    }}
</script>
运行效果:
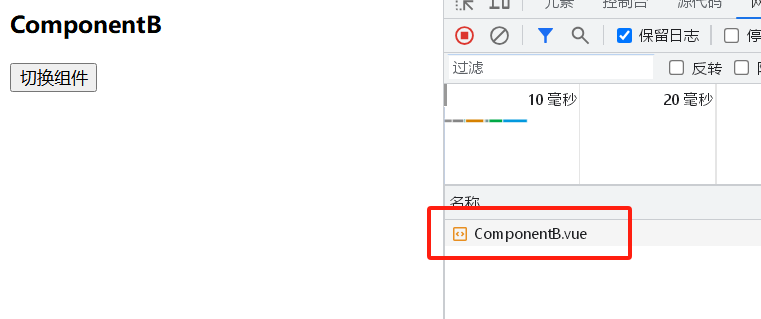
当进入页面时会进行一次组件和数据的加载但是ComponentB是异步加载,所以ComponentB是不会被加载进来的,当点击切换组件后,ComponentB.vue会在网络请求中进行加载。
依赖注入(祖宗传数据给子孙provide,inject)
注意:provide和inject只能由上往下传(即祖宗给子孙传)
main.js
xxxxxxxxxximport { createApp } from 'vue'import App from './App.vue'
const app = createApp(App)// 全局数据,在任何地方都能读取该数据app.provide("globalData","我是全局数据,在任何地方不管有没有关系都可以读取")app.mount('#app')
注意:使用provide创建的globalData为全局数据,在任何地方不管有没有关系都可以读取。
App.vue
xxxxxxxxxx<template>    <h3>祖宗</h3>    <Parent/></template>
<script>import Parent from './components/Parent.vue'export default{    data(){        return{            msg:'爷爷的财产~~~'        }    },    components:{        Parent    },    provide(){        return{            msg:this.msg        }    }}</script>
Parent.vue
xxxxxxxxxx<template> <h3>Parent</h3> <p></p> <Child /></template>
<script>import Child from './Child.vue'export default{ inject:['globalData'], components:{ Child }}</script>Child.vue
xxxxxxxxxx<template> <h3>Child</h3> <p></p> <p></p> <p></p></template>
<script>export default{ inject:['msg','globalData'], // 也可以将msg先传递给data进行处理再显示 data(){ return{ fullMsg:this.msg+String("123") } }}</script>运行结果:
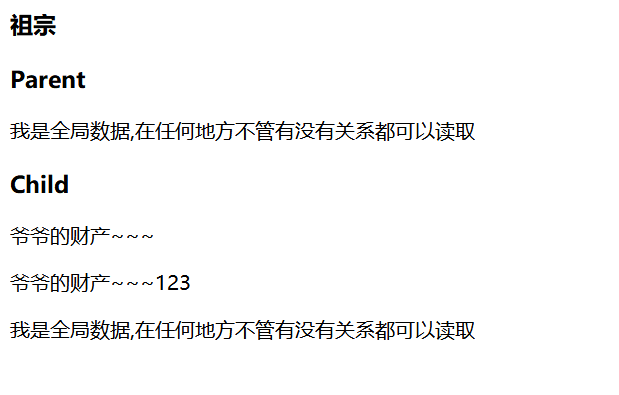
vue引入第三方(swiper轮播图为例)
Swiper开源 免费 强大 自适应的触摸滑动插件
xxxxxxxxxx1.安装最新swipernpm i swiper --save
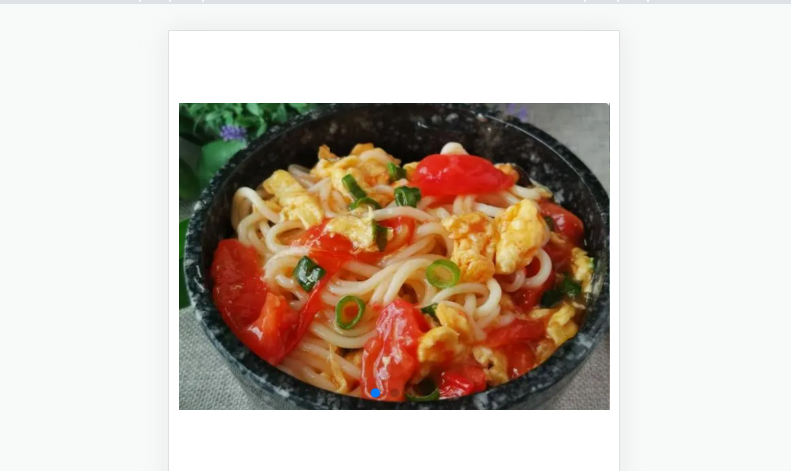
安装指定版本的swipernpm i swiper@8.1.6 --savexxxxxxxxxx<template> <div class="hello"> <swiper :modules="modules" :pagination="{ clickable: true }"> <SwiperSlide> <img src=" https://xiaoyangtongzhi.cn/link/food/img_food/xihongshijidandalumian.png" alt="vue logo"> </SwiperSlide> <SwiperSlide> <img src="https://xiaoyangtongzhi.cn/link/food/img_food/qiedingroumodalumian.png" alt="vue logo"> </SwiperSlide> <SwiperSlide> <img src="https://xiaoyangtongzhi.cn/link/food/img_food/moguroumodalumian.png" alt="vue logo"> </SwiperSlide> </swiper> </div></template>
<script>import { Pagination } from 'swiper';import 'swiper/css/pagination';import { Swiper, SwiperSlide } from 'swiper/vue';import 'swiper/css';
export default { data(){ return{ modules: [Pagination], } }, components: { Swiper, SwiperSlide, Pagination, },}</script>
<style scoped>img{ width: 100%;}</style>运行结果:
Axios网络请求
xxxxxxxxxxAxios需要安装并不是vue内部集成的npm install --save axios
字符串的转换安装包npm install --save querystring
在main.js进行全局引用,日后开发需要很多用到网络请求的地方,因此进行全局引用
前提:已进行跨域
xxxxxxxxxximport axios from 'axios'const app = createApp(App)app.config.globalProperties.$axios = axiosapp.mount('#app')xxxxxxxxxx<template> <div class="hello"> <p></p> </div></template>
<script>// import axios from 'axios';import querystring from 'querystring';export default { data() { return { msg: '' } }, mounted() { //get请求方式 this.$axios({ method:"get", url:"http://iwenwiki.com/api/blueberrypai/getChengpinDetails.php", }).then(res=>{ console.log(res.data); this.msg = res.data.chengpinDetails[0]; })
//post请求方式 this.$axios({ method:"post", url:"http://iwenwiki.com/api/blueberrypai/login.php", data:querystring.stringify({ user_id: "iwen@qq.com", password: "iwen123", verification_code:"crfvw" }) }).then(res=>{ console.log(res.data); })
//快捷方案get this.$axios.get("http://iwenwiki.com/api/blueberrypai/getChengpinDetails.php").then(res=>{ console.log(res.data); })
//快捷方式post this.$axios.post("http://iwenwiki.com/api/blueberrypai/login.php",querystring.stringify({ user_id: "iwen@qq.com", password: "iwen123", verification_code:"crfvw" })).then(res=>{ console.log(res.data); }) }}</script>运行结果:

Axios网络请求的封装
1.在src下新建utils文件夹
1.1创建request.js
request.js
xxxxxxxxxximport axios from "axios";import querystring from "querystring";
//参考文档 https://www.kancloud.cn/yunye/axios/234845
const errorHandle = (status,info) => {    switch (status) {        case 400:            console.log("语义有误");            break;        case 401:            console.log("服务器认证失败");            break;        case 403:            console.log("服务器拒绝访问");            break;        case 404:            console.log("请求错误,未找到该资源");            break;        case 405:            console.log("请求方法未允许");            break;        case 500:            console.log("服务器内部错误");            break;        case 501:            console.log("服务器不支持该请求的函数");            break;        case 502:            console.log("服务器无响应");            break;        default:            console.log(info);            break;    }}

const instance = axios.create({  // 网络请求的公共配置  timeout: 5000,  headers: {    "Content-Type": "application/x-www-form-urlencoded",  }});
// 请求拦截器最常用的
// 发送数据之前instance.interceptors.request.use(    config => {        if(config.method === "post"){            config.data = querystring.stringify(config.data);        }      // console.log(config);      // config包含网络请求的所有信息      return config;    },    error => {      // console.log(error);      return Promise.reject(error);    })
// 响应拦截器instance.interceptors.response.use(    response => {      // console.log(response);      return response.status === 200 ? Promise.resolve(response) : Promise.reject(response);    },    error => {      // console.log(error);      const { response } = error;      errorHandle(response.status,response.info);    })

export default instance;
2.在src下新建api文件夹
2.1在api文件夹下创建index.js和path.js
path.js
xxxxxxxxxxconst base = {    baseUrl:"http://localhost:5001/",    peopleAdmin:"api/peopleAdmin",    delPeopleAdmin:"api/delPeopleAdmin"}
export default base;
index.js
xxxxxxxxxximport axios from "../utils/request";import path from "./path";
const api = {    //请求管理人员表格数据    getPeopleAdminTableData(){        return axios.get(path.baseUrl+path.peopleAdmin);    },    //删除管理人员数据    postDelPeopleAdmin(idList){        return axios.post(path.baseUrl+path.delPeopleAdmin,{ idList: JSON.stringify(idList) });    }}
export default api;
3.在components文件夹下试用vue进行引用
xxxxxxxxxx<template></template>
<script setup>import api from '../api/index';//GETapi.getPeopleAdminTableData().then(res=>{    // 清空原有数据再填充新数据    tableData.value = [];    // console.log(res.data)    for(var i in res.data){        tableData.value.push(res.data[i])    }    //给分页数据总长度赋值    total.value = parseInt(tableData.value.length)})    //POSTapi.postDelPeopleAdmin(idList).then(res=>{    // console.log("message",res.data.message)    // console.log("status",res.status)    if(res.status == 200 && res.data.message == "删除成功"){        ElMessage.success('删除成功')        //重新请求表格数据        getTableData()    }    if(res.data.message == "删除失败"){        ElMessage.error('删除失败')    }})</script>
后端python
app.py
xxxxxxxxxxfrom flask import Flaskfrom views.peopleAdmin import getPeopleAdminTableData,delPeopleAdminTableDatafrom flask_cors import CORS
app = Flask(__name__)CORS(app, resources={r"/*": {"origins": "*"}})# 获取peopleAdmin数据app.add_url_rule('/api/peopleAdmin', methods=['GET'], view_func = getPeopleAdminTableData)# 删除peopleAdmin数据app.add_url_rule('/api/delPeopleAdmin', methods=['POST'] ,view_func = delPeopleAdminTableData)
if __name__ == '__main__':    app.run(host='0.0.0.0', port=5001)
views/peopleAdmin.py
xxxxxxxxxxfrom flask import jsonify,requestimport jsonfrom conn_sql import conndef getPeopleAdminTableData():    cur = conn.cursor()    select_sql = "SELECT * FROM admin_user"    cur.execute(select_sql)    result = cur.fetchall()    # 将查询结果转换为字典列表    data_list = [{column[0]: value for column, value in zip(cur.description, row)} for row in result]    return jsonify(data_list)
def delPeopleAdminTableData():    # 获取请求中的idList参数    id_list = request.form.get('idList')  # 假设前端传递的是以某种方式分隔的字符串,如"1,2,3"    id_list = json.loads(id_list) #[1,2,3]    # return jsonify({"return message": id_list})
    # 构造用于 IN 子句的占位符字符串    ids = ','.join(['%s'] * len(id_list))
    # 执行SQL删除操作    try:        delete_sql = f'DELETE FROM admin_user WHERE id IN ({ids})'        cur = conn.cursor()        cur.execute(delete_sql, id_list)        conn.commit()  # 提交事务        return jsonify({"message": "删除成功"}), 200
    except Exception as e:        conn.rollback()  # 如果发生错误,回滚事务        print(f"删除操作时出现错误: {e}")        return jsonify({"message": "删除失败"}), 500
    finally:        cur.close()  # 关闭游标
Axios网络请求跨域解决方案
解决方法:
1.后台解决
2.前台解决
这里只讲前台解决
在vue.config.js中的transpileDependencies: true,后面加入,url需要放入产生跨域的域名即可
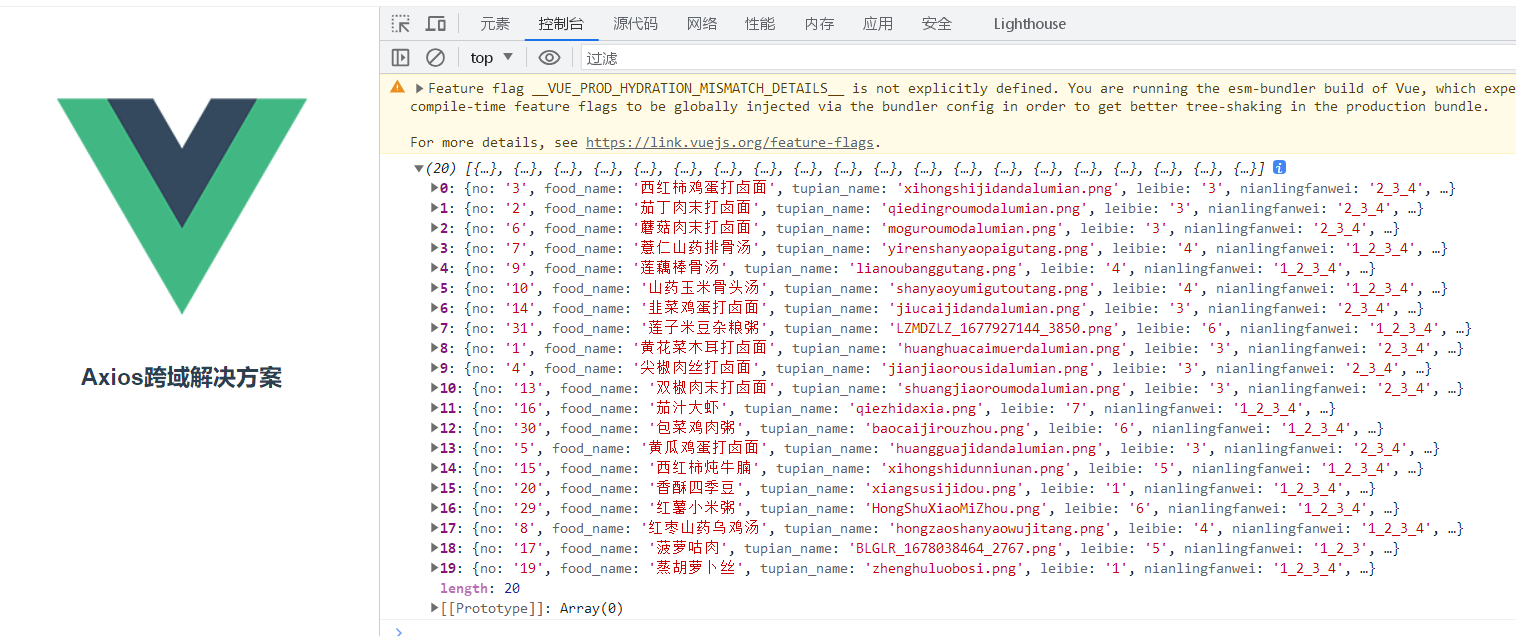
xxxxxxxxxxdevServer:{ proxy: { '/api': { target: 'https://www.xiaoyangtongzhi.cn/', //接口域名 changeOrigin: true, //是否跨域 ws: true, //是否代理 websockets secure: true, //是否https接口 pathRewrite: { //路径重置 '^/api': '' } } } }在vue文件中写请求 在请求的时候无需再写域名,但是需要加入vue.config.js配置的代理名/api
例如 axios.get('/api/剩余域名')
重启服务器
xxxxxxxxxx<template>    <h3>Axios跨域解决方案</h3></template>
<script>import axios from 'axios';
export default {    mounted(){      axios.get('/api/link/food/php/auto_search.php')      .then((res) => {        console.log(res.data);      })    }}</script>
运行结果:
vue引入路由配置(router)
xxxxxxxxxx1.安装路由命令npm install --save vue-router在src下创建router文件夹
2.1 router下创建index.js
index.js
xxxxxxxxxximport { createRouter, createWebHashHistory } from "vue-router"import HomeView from '../views/HomeView'
//配置信息中需要页面的相关配置const routes = [    {        path:"/",        name: 'home',        component:HomeView    },    {        path:"/about",        name: 'about',        //这是异步加载方式        component: () => import('../views/AboutView.vue')    }]
//创建路由const router = createRouter({    /**     * createWebHashHistory     *     home:http://localhost:8080/#/     *     about:http://localhost:8080/#/about     * 此种方式不会出现404问题     * 原理:a标签锚点链接     *      * createWebHistory     *     home:http://localhost:8080/     *     about:http://localhost:8080/about     * 此种方式需要后台配合做重定向,否则会出现404问题     * 原理:H5的pushState()方法     */

    history: createWebHashHistory(),    routes  })
export default router;
src下创建views文件夹,用于放页面
3.1 views文件夹内创建HomeView.vue和AboutView.vue
HomeView.vue
xxxxxxxxxx<template> <h3>首页</h3></template>AboutView.vue
xxxxxxxxxx<template> <h3>关于页面</h3></template>在main.js引入router下的index.js
main.js
xxxxxxxxxximport { createApp } from 'vue'import App from './App.vue'import './registerServiceWorker'
import router from './router/index'createApp(App).use(router).mount('#app')
App.vue
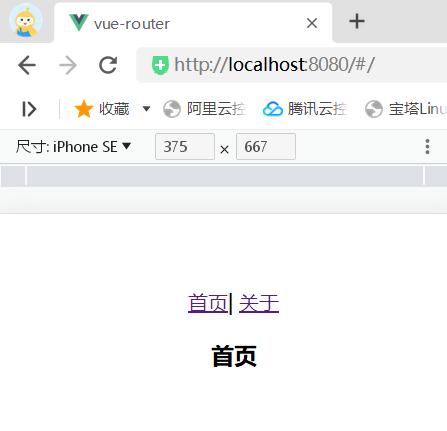
xxxxxxxxxx<template>  <!-- 路由的显示入口 -->  <router-link to="/">首页</router-link>|  <router-link to="/about">关于</router-link>  <router-view></router-view></template>
<style>#app {  text-align: center;  margin-top: 60px;}</style>
运行结果:
点击首页
点击关于

路由传递参数
router下index.js
xxxxxxxxxximport { createRouter, createWebHashHistory } from 'vue-router'import HomeView from '../views/HomeView.vue'
const routes = [  {    path: '/',    name: 'home',    component: HomeView  },  {    path: '/about',    name: 'about',    component: () => import('../views/AboutView.vue')  },  {    path:'/news',    name:'news',    //异步加载方式    component:() => import('../views/NewsView.vue')  },  {    path:'/newsdetails/:name',    name:'newsdetails',    component:() => import('../views/NewsDetailsView.vue')  }]
const router = createRouter({  history: createWebHashHistory(),  routes})
export default router
views文件夹下
HomeView.vue
xxxxxxxxxx<template> <h3>首页</h3></template>AboutView.vue
xxxxxxxxxx<template> <h3>关于页面</h3></template>NewsView.vue
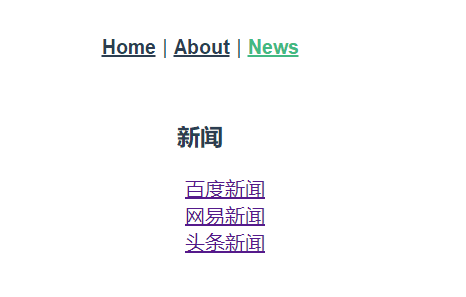
xxxxxxxxxx<template><h3>新闻</h3><ul><li><router-link to="/newsdetails/百度">百度新闻</router-link></li><li><router-link to="/newsdetails/网易">网易新闻</router-link></li><li><router-link to="/newsdetails/头条">头条新闻</router-link></li></ul></template><style scoped>li {list-style: none;}</style>
NewsDetailsView.vue
xxxxxxxxxx<template> <h3>新闻详情</h3> <!-- 接收参数,name是在index.js里设置的:name --> <p></p></template>Main.js
xxxxxxxxxximport { createApp } from 'vue'import App from './App.vue'import './registerServiceWorker'
import router from './router'createApp(App).use(router).mount('#app')
App.vue
xxxxxxxxxx<template> <nav> <router-link to="/">Home</router-link> | <router-link to="/about">About</router-link> | <router-link to="/news">News</router-link> </nav> <router-view/></template>
<style>#app { font-family: Avenir, Helvetica, Arial, sans-serif; font-smoothing: antialiased; osx-font-smoothing: grayscale; text-align: center; color: #2c3e50;}
nav { padding: 30px;}
nav a { font-weight: bold; color: #2c3e50;}
nav a.router-link-exact-active { color: #42b983;}</style>运行结果:
新闻界面
点击百度新闻

点击网易新闻

嵌套路由配置
二级路由即是在index.js中加入children属性
router下index.js
xxxxxxxxxximport { createRouter, createWebHashHistory } from 'vue-router'import HomeView from '../views/HomeView.vue'
const routes = [  {    path: '/',    name: 'home',    component: HomeView  },  {    path: '/about',    name: 'about',    redirect: '/about/us',//默认进入关于我们的页面    component: () => import('../views/AboutView.vue'),    children: [      {        //注意 二级导航的path不要加/        path: 'us',        name: 'us',        component: () => import('../views/AboutSub/AboutUs.vue')      },      {        //注意 二级导航的path不要加/        path: 'info',        name: 'info',        component: () => import('../views/AboutSub/AboutInfo.vue')      }    ]  }]
const router = createRouter({  history: createWebHashHistory(),  routes})
export default router
在二级导航页面加
AboutView.vue
xxxxxxxxxx<template> <div class="about"> <router-link to="/about/us">关于我们</router-link> | <router-link to="/about/info">关于信息</router-link> <router-view></router-view> </div></template>实现效果:
默认进去显示关于我们

点击关于信息 显示关于信息

Vue状态管理(引入Vuex传输数据)
1.安装vuex
npm install vuex --save
2.在src下创建store文件夹
2.1 store下创建index.js
index.js
xxxxxxxxxximport { createStore } from 'vuex'
// Vuex的核心就是帮我们管理组件之间的数据(状态)的export default createStore({  //所有的数据(状态)都放在state里  state: {    counter: 0  }})
3.main.js中引入index.js
main.js
xxxxxxxxxximport { createApp } from 'vue'import App from './App.vue'import './registerServiceWorker'
import store from './store/index'createApp(App).use(store).mount('#app')
4.使用数据
App.vue 引入数据的第一种方式
xxxxxxxxxx<template> <!-- 引入数据的第一种方式 --> <p>counter: </p> <HelloWorld/></template>
<script>import HelloWorld from './components/HelloWorld.vue';export default { components:{ HelloWorld }}</script>HelloWorld.vue 引入数据的第二种方式
xxxxxxxxxx<template> <!-- 3.直接读取值 --> <p>counter: </p></template>
<script>//1.引用数据的第二种方式import { mapState } from 'vuex';export default { computed:{ //2.在这里专门读取vuex的数据 mapState(['counter']) }}</script>效果图:

Vue状态管理的核心Vuex
最常用的核心有:State Getter Mutation Action
state是数据管理,vue状态管理中已讲
1.Getter 对Vuex中的数据进行过滤
2.Mutation数据读取和修改
3.Action功能类似于Mutation,区别是Action进行异步提交数据给Mutation,然后由Mutation进行修改,有异步要求的话Action要配合Mutationji那些修改,如果没有异步要求Mutation自己修改即可。
默认创建项目时选中router和vuex,且已配置好axios跨域
store文件夹下index.js
xxxxxxxxxximport { createStore } from 'vuex'import axios from 'axios'
export default createStore({  state: {    counter:0  },  //对数据进行过滤  getters:{    getCounter(state){      return state.counter>0 ? state.counter : "counter小于0,不符合要求"     }  },  //对数据进行读取和修改,任何组件引用这个值都会得到相应的修改  mutations:{    addCounter(state,num){      state.counter += num    }  },  //action只允许异步操作,不能直接修改数据,只能通过mutations修改数据  actions:{      asyncAddCounter({commit}){          axios.get('/api/link/food/php/auto_search.php').then(res=>{              console.log(res.data[0].no);              //res.data[0].no的值应该是3              //将res.data[0].no转为整数              commit('addCounter',parseInt(res.data[0].no))          })      }  }})
views文件夹下HomeView.vue 第一种读取数据的方式
xxxxxxxxxx<template> <div class="home"> <h3>home</h3> <p>Home-counter: </p> <button @click="addClickHandler">增加</button> <button @click="addAsyncClickHandler">异步增加</button> </div></template>
<script>export default { methods: { addClickHandler() { //固定调用vuex的方法 this.$store.commit("addCounter",15); }, addAsyncClickHandler() { this.$store.dispatch("asyncAddCounter"); } }};</script>注意:vue3中不再使用this.$store.commit("addCounter",15);而是使用下面这种按需导入的方式,取值也是不能用$store.state,用store.state.xxx
xxxxxxxxxx<script>import { useStore } from 'vuex'
// 获取vuex中的storeconst store = useStore()
export default {  methods: {    addClickHandler() {      //vue3调用vuex的方法      store.commit("addCounter",15);    },    addAsyncClickHandler() {      store.dispatch("asyncAddCounter");    }  }};</script>
views文件夹下AboutView.vue 第二种读取数据的方式
xxxxxxxxxx<template> <div class="about"> <h3>关于</h3> <p>About-counter: </p> <button @click="addClickHandler">增加</button> <button @click="addAsyncClickHandler">异步增加</button> </div></template>
<script>import { mapGetters, mapMutations,mapActions } from "vuex";export default { computed:{ mapGetters(["getCounter"]) }, methods:{ mapMutations(["addCounter"]), mapActions(["asyncAddCounter"]), addClickHandler() { //固定调用vuex的方法 this.addCounter(15); }, addAsyncClickHandler() { this.asyncAddCounter(); } }}</script>main.js 引用路由router和vuex
xxxxxxxxxximport { createApp } from 'vue'import App from './App.vue'import './registerServiceWorker'
import router from './router'import store from './store'createApp(App).use(store).use(router).mount('#app')
vue.config.js 配置跨域使用axios
xxxxxxxxxxconst { defineConfig } = require('@vue/cli-service')module.exports = defineConfig({ transpileDependencies: true, devServer:{ proxy: { '/api': { target: 'https://xiaoyangtongzhi.cn/', //接口域名 changeOrigin: true, //是否跨域 ws: true, //是否代理 websockets secure: true, //是否https接口 pathRewrite: { //路径重置 '^/api': '' } } } }})
运行效果:
只展示第一种home界面下,因为两种读取数据的方式不同,但是效果是一样的

这是由getters里getCounter函数对数据进行过滤
点击增加按钮:

这是由 mutations下的addCounter函数进行修改的
点击异步增加按钮:
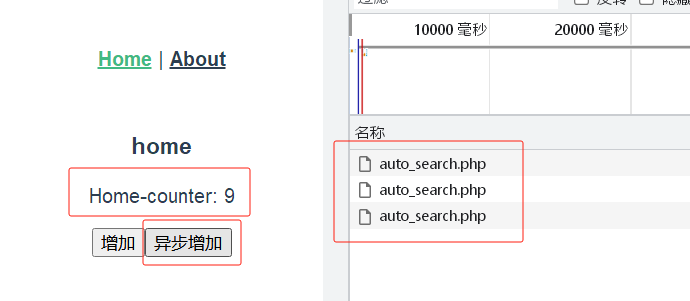
这是由actions下的asyncAddCounter函数异步调用api返回的数值为3,每点击一次就会增加3,同时进行一次异步获取API数据。
以下是一个例子
login.vue
xxxxxxxxxx<template> <div class="login_wrap"> <div class="form_wrap"> <el-form ref="formRef" :model = "loginData" label-width = "100px" class="demo-dynamic" > <el-form-item prop = "username" label = "用户名" :rules = "[ { required:true, message:'此项为必填项', trigger:'blur', }, ]" > <el-input v-model="loginData.username" placeholder="请输入用户名" /> </el-form-item>
<el-form-item prop = "password" label = "密码" :rules = "[ { required:true, message:'此项为必填项', trigger:'blur', }, ]" > <el-input type="password" v-model="loginData.password" placeholder="密码" /> </el-form-item> <el-button type="primary" class="login_btn" @click="handleLogin">登录</el-button> <p></p> </el-form> </div> </div></template>
<script>import { reactive,toRefs } from 'vue';import { useStore } from 'vuex';export default { name: 'login', setup(){ const store = useStore(); const count = store.state.number.count; const data = reactive({ loginData: { username: '', password: '', }, num:count, }) console.log("修改器的getters",store.getters["number/countStatus"]); function handleLogin(){ // store.commit('number/setCount',100); store.dispatch('number/setCountPromise',100).then(res=>{ alert("修改成功"); }).catch(err=>{ alert(err) }); console.log(store.state.number.count) console.log("修改后getters:", store.getters["number/countStatus"]); } return { toRefs(data), handleLogin } }}</script>
<style scoped>.login_wrap{ width: 100%; height: 100vh; background-color: rgb(56, 86, 139); position: relative;}.form_wrap{ position: fixed; top: 50%; left: 50%; transform: translate(-50%,-50%); background-color: #fff; padding: 30px 50px; border-radius: 5px;}.login_btn{ margin: 0 auto; display: block;}</style>store/index.js
xxxxxxxxxximport { createStore } from 'vuex'import number from './state/num.state'export default createStore({ //数据比较多,分模块 modules: { number }})store/state/num.state.js
xxxxxxxxxxexport default{ namespaced: true, //全局状态初始化 state: { count:1, }, //计算state,获取相应的值 getters: { countStatus(state){ return state.count <= 1 } }, //更新状态的方法-更新state的唯一方法,commit mutations mutations: { setCount(state,num){ state.count = num } }, //可以异步操作,可以返回promise,更改数据还是传递到mutations去更改 actions: { setCountPromise({commit},num){ return new Promise((resolve, reject)=>{ if(num>100){ reject('值不能大于100'); }else{ commit('setCount',num) resolve(); } }) } },}
vue3新特性
- Performance:性能比Vue2.0强
- Tree shaking support: 可以将无用的模块“剪辑”,仅打包需要的。
- Composition API:组合式API
- Fragment,Teleport,Suspense: "碎片",Teleport即Protal传送门,“悬念”
- Better TypeScript support: 更优秀的Ts支持
- Custom Renderer API:暴露了自定义渲染API
组合式API
在vue2.x中通过组件data的方法来自定义一些当前组件的数据
xxxxxxxxxxdata(){ return{ name:"小杨", list:[] }}在vue3.x中通过ref或者reactive创建响应式对象
ref是简单型的数据使用率高,reactive是复杂性数据使用率高,功能类似
如下是引用数据
xxxxxxxxxx<template> <div class="hello"> <p></p> <ul> <li v-for="(item,index) in names.list" :key="index"></li> </ul> </div></template>
<script>import { ref,reactive } from 'vue'export default { //组合式API setup() { //ref const msg = ref('hello world'); //reactive const names = reactive({ list:['张三','李四','王五'] }); return { msg, names } }}</script>methods中定义方法写在setup中
在vue2.x中methods来定义一些当前组件内部方法
xxxxxxxxxxmethods:{ http(){}}在vue3.x中直接在setup方法中定义并return
xxxxxxxxxxsetup(){ const http = ()=>{ //do something } return { http };}setup中可以使用props和context
xxxxxxxxxx<template> <div class="hello"> <p></p> <ul> <li v-for="(item,index) in names.list" :key="index"></li> </ul> <button @click="clickHandle">按钮</button> <p></p> </div></template>
<script>import { ref,reactive } from 'vue'export default { props:{ msg:String }, //组合式API setup(props,ctx) { //setup中没有this //setup中有context(ctx) //ref const message = ref('hello world'); //reactive const names = reactive({ list:['张三','李四','王五'] }); function clickHandle() { console.log("点击了"); //一定要通过msg.value修改数据 message.value = 'hello vue3'; } const msg = props.msg; return { message, names, clickHandle, msg } }}</script>运行结果:

在setup中使用生命周期
可以通过在生命周期钩子前面加上on来访问组件的生命周期钩子。
下面是如何在setup()内部调用生命周期钩子
| Options API | Hook inside setup |
|---|---|
| beforeCreate | Not needed* |
| created | Not needed* |
| beforeMount | onBeforeMount |
| mounted | onMounted |
| beforeUpdate | onBeforeUpdate |
| updated | onUpdated |
| beforeUnmount | onBeforeUnmount |
| unmounted | onUnmounted |
xxxxxxxxxx<template>  <div class="hello">  </div></template>
<script>import { onMounted } from 'vue';export default {  setup(){    //比以前有优势,以前同一个生命周期函数只能存在一个,现在可以存在多个    onMounted(()=>{      console.log('生命周期Mounted1');    })    onMounted(()=>{      console.log('生命周期Mounted2');    })  }}</script>
Provide / Inject
注意:只能是父传子
- provide()和inject()可以实现嵌套组件之间的数据传递
- 这两个函数只能在setup()函数中使用。
- 父级组件中使用provide() 函数向下传递数据。
- 子级组件中使用inject() 获取.上层传递过来的数据。
- 不限层级
用法
父组件
xxxxxxxxxx<script>import Child from './components/Child.vue'import { provide } from 'vue';export default { components: { HelloWorld }, setup(){ provide('message','hello world') }}</script>子组件
xxxxxxxxxx<script>import { inject } from 'vue';export default { setup(){ const message = inject('message'); return { message } }}</script>Vue3加载Element-plus
地址:https://element-plus.org/zh-CN/component/overview.html
安装命令
xxxxxxxxxxnpm install element-plus --save引用element-plus分为两种方式 完整引用和按需导入
完整引入打包时会使项目体积非常大
按需导入需要哪个引用哪个
完整引用
main.js
xxxxxxxxxximport { createApp } from 'vue'import App from './App.vue'import './registerServiceWorker'
import ElementPlus from 'element-plus'import 'element-plus/dist/index.css'createApp(App).use(ElementPlus).mount('#app')xxxxxxxxxx<template> <div class="hello"> <!-- 按钮 --> <div class="mb-4"> <el-button>Default</el-button> <el-button type="primary">Primary</el-button> <el-button type="success">Success</el-button> <el-button type="info">Info</el-button> <el-button type="warning">Warning</el-button> <el-button type="danger">Danger</el-button> </div> <!-- 开关 --> <el-switch v-model="value1" /> <el-switch v-model="value2" class="ml-2" style="--el-switch-on-color: #13ce66; --el-switch-off-color: #ff4949" /> </div></template>
<script>import { ref } from 'vue'export default{ setup(){ const value1 = ref(true) const value2 = ref(true) return{ value1, value2 } }}
</script>运行效果:

按需导入
按照unplugin-vue-components和unplugin-auto-import这两个插件
命令:
xxxxxxxxxxnpm install -D unplugin-vue-components unplugin-auto-import修改vue.config.js配置文件 直接覆盖即可
xxxxxxxxxxconst { defineConfig } = require('@vue/cli-service')const AutoImport = require('unplugin-auto-import/webpack')const Components = require('unplugin-vue-components/webpack')const { ElementPlusResolver } = require('unplugin-vue-components/resolvers')
module.exports = defineConfig({  transpileDependencies: true,  configureWebpack: {    plugins: [      AutoImport({        resolvers: [ElementPlusResolver()],      }),      Components({        resolvers: [ElementPlusResolver()],      }),    ],  },})
Vue3加载Element-plus的字体图标
地址:https://element-plus.org/zh-CN/component/icon.html
1.安装element-plus
xxxxxxxxxxnpm install element-plus --save2.安装字体图标
xxxxxxxxxxnpm install @element-plus/icons-vue3.在项目根目录下,创建 plugins 文件夹,在文件夹下创建文件文件icons.js
icons.js
xxxxxxxxxximport * as components from '@element-plus/icons-vue';export default { install: (app) => { for (const key in components){ const componentConfig = components[key]; app.component(componentConfig.name, componentConfig); } },};4.在main.js中引入icons.js文件
xxxxxxxxxximport { createApp } from 'vue'import App from './App.vue'import './registerServiceWorker'
// 全局引入ElementPlusimport ElementPlus from 'element-plus'import 'element-plus/dist/index.css'// 引入图标elementIconimport elementIcon from './plugins/icons';//使用ElementPlus和图标elementIconcreateApp(App).use(ElementPlus).use(elementIcon).mount('#app')
使用图标即可
xxxxxxxxxx<template>  <div class="hello">      <el-icon :size="50" color="lightblue"><Search /></el-icon>  </div>  <div style="font-size: 20px">    <!-- 由于SVG图标默认不携带任何属性 -->    <!-- 你需要直接提供它们 -->    <Edit style="width: 1em; height: 1em; margin-right: 8px" />    <Share style="width: 1em; height: 1em; margin-right: 8px" />    <Delete style="width: 1em; height: 1em; margin-right: 8px" />    <Search style="width: 1em; height: 1em; margin-right: 8px" />  </div></template>
<script>export default {
}</script>
运行效果:

toRefs的使用
xxxxxxxxxx<template> <h1>hello world</h1> <p></p> <p v-html="info"></p> <p :data="dataVal">我有属性data</p> <!-- 类名绑定 可以叠加使用--> <p class="text" :class="{'red':isRed}">我是红色的</p></template>
<script> import {reactive, toRefs} from 'vue' export default{ name:"home", setup(){ //相当于beforeCreate和created const data = reactive({ name:"小红", age:20, info:"<i>我是斜体字</i>", dataVal:20, isRed:true })
return{ //...toRefs(data)再使用就不用加data了 toRefs(data), } } }</script>js获取焦点focus
失去焦点blur
改变change
点击按钮router跳转
xxxxxxxxxximport {useRouter} from 'vue-router'
const router = useRouter();// 获取路由实例const login = () => {    router.push({ path: '/login' });//使用路由跳转到登录界面}
vue报错:WebSocket connection to
控制台报错
xxxxxxxxxxWebSocketClient.js:13 WebSocket connection to 'ws://192.168.48.103:8080/ws' failed: Error in connection establishment: net::ERR_CONNECTION_TIMED_OUT解决方法:在vue.config.js中加入
xxxxxxxxxxdevServer:{ host: '0.0.0.0', port:8080, client: { webSocketURL: 'ws://0.0.0.0:8080/ws', }, headers: { 'Access-Control-Allow-Origin': '*', }}
防抖功能
安装
xxxxxxxxxxnpm install lodash导包
xxxxxxxxxximport _ from 'lodash'使用
xxxxxxxxxx<el-input @input="debounceCheckYongHu" v-model="form.yonghu" input-width="80%" />
<script setup>//声明防抖函数let debounceCheckYongHu;const test = ()=>{    //使用防抖函数,在功能函数里使用    debounceCheckYongHu = _.debounce(checkYongHu, 500); // 延迟500毫秒后执行}</script>
cookie_js
安装
xxxxxxxxxxnpm install cookie_js --save存储
xxxxxxxxxxcookie.set("key","value");cookie.set({key1:"value1", key2:"value2"});获取
xxxxxxxxxxcookie.get("key");cookie.get(['key1','key2']);清除
xxxxxxxxxxcookie.remove('key');cookie.remove('key1', 'key2');cookie.remove(['key1', 'key2']);sessionStorage
关闭浏览器自动清除,具有临时性
存储大小:5M
存储于客户端
只能存储字符串类型
存储
xxxxxxxxxxwindow.seesionStorage.setItem("key","value");获取
xxxxxxxxxxwindow.sessionStorage.getItem("key");删除
xxxxxxxxxxwindow.sessionStorage.removeItem("key");清空所有
xxxxxxxxxxsessionStorage.clear();localStorage
需要手动清除,具有长期性
存储
xxxxxxxxxxwindow.localStorage.setItem("key","value");获取
xxxxxxxxxxwindow.localStorage.getItem("key");删除
xxxxxxxxxxwindow.localStorage.remove("key");清除所有
xxxxxxxxxxlocalStorage.clear();
vue修改标题
在router文件夹下index.js
1.给每一个路由加入meta标签
xxxxxxxxxx{ path: '/login', name: 'login', component: () => import('../views/Login.vue'), meta: { title: '登录页', keepAlive: true, // 需要被缓存 } },2.在main.js加入
xxxxxxxxxxrouter.beforeEach((to, from, next) => { //路由发生改变时,触发 window.document.title = to.meta.title == undefined ? '默认标题' : to.meta.title if (to.meta.requireAuth) { let token = Cookies.get('access_token'); let anonymous = Cookies.get('user_name'); if (token) { next({ path: '/login', query: { redirect: to.fullPath } }) } } next();})
按钮设置快捷键
1.在el-form里添加 @keydown.native.enter="onEnterPress"
xxxxxxxxxx<el-form :model="loginData" @keydown.native.enter="onEnterPress">2.在script里写onEnterPress函数
xxxxxxxxxxconst onEnterPress = (event) => { // 避免表单内的textarea元素触发登录 if (event.target.tagName.toLowerCase() !== 'textarea') { toLogin(); }}